I’ve learned that most kitchen extensions fail because homeowners jump straight to aesthetics without considering layout, light, and flow. You’re likely facing the same challenge: maximizing a tight footprint while creating that open, connected feel you see in design magazines. The good news? It’s entirely achievable with strategic planning.
Here’s what separates well-executed extensions from expensive mistakes.
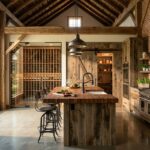
Start With the Right Kitchen Extension Layout

How do you design a kitchen extension that actually works? I’ll tell you—it starts with respecting the work triangle. Your sink, hob, and fridge need efficient spacing so you’re not running marathons between tasks.
A functional kitchen extension respects the work triangle—efficient spacing between sink, hob, and fridge eliminates unnecessary steps.
I’d recommend considering a side return extension or open-through design that knocks through existing walls. This approach maximizes your square footage without breaking the budget. Here’s where glazing makes a real difference: skylights and rear wall French doors flood worktops with natural light, making your space feel genuinely spacious.
For flexible zoning, I skip walls and embrace breakfast bars and built-in storage instead. They define zones naturally while keeping your kitchen functional. Integrated appliances disappear seamlessly, and dining and living areas flow together beautifully.
This layout isn’t just practical. It’s where your home actually lives.
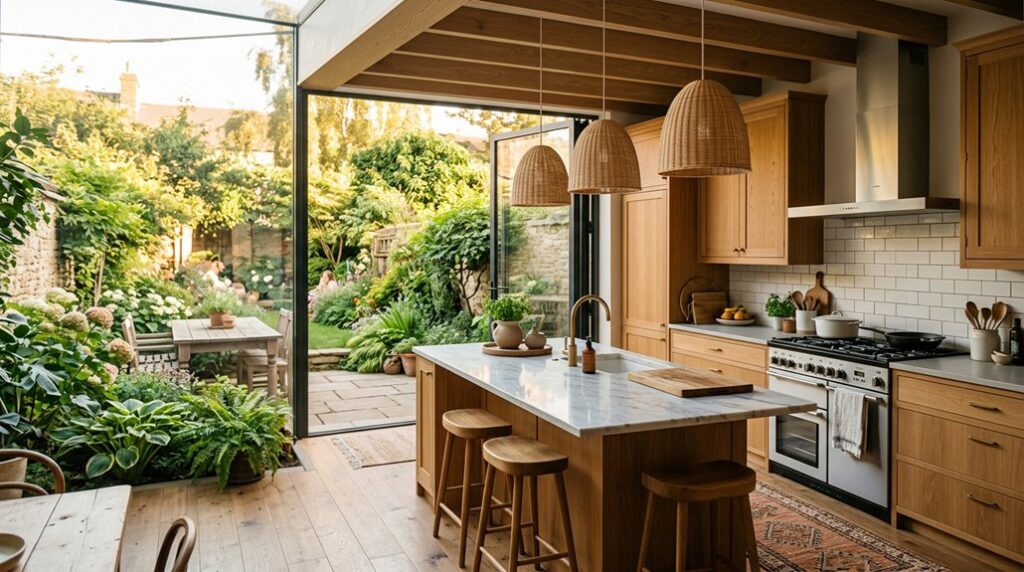
Bring Natural Light Into Your Kitchen Extension

Why does natural light feel so valuable in a kitchen extension? It banishes shadows, reduces artificial lighting needs, and makes your space feel genuinely larger. I’d recommend installing skylights over your working triangle, they’ll dramatically improve visibility during cooking.
Glass roofs and large windows become your hidden advantage here. Position glazing strategically to catch morning or afternoon sun, maximizing daylight penetration. Pale timber floors, lighter ceilings, and soft wall tones amplify incoming light beautifully.
Consider glass doors connecting to your garden or side extension; they create that fluid indoor-outdoor experience we all crave. Bi-fold or sliding doors work wonderfully too. These glazing strategies don’t just brighten tight spaces, they frame your garden views and visually expand your kitchen beyond its actual footprint, creating the open spaces that make us feel truly at home.
Connect Your Kitchen Extension to Dining and Garden

Once you’ve flooded your kitchen extension with natural light, the next logical step is creating seamless connections between your cooking space, dining area, and garden. They’re all part of the same experience.
I’ve found that bi-fold and sliding doors dissolve boundaries beautifully, establishing that coveted indoor-outdoor connection. When you match your interior flooring with exterior materials, you’ll visually enlarge the space dramatically. Position your dining area near expansive glass openings to maximize natural light during meals while keeping garden views front and center.
Here’s what makes your extension work as an entertaining hub:
- Install bi-fold or sliding doors for effortless access
- Use matching flooring inside and outside
- Position dining near large glazing
- Add covered verandas for year-round use
- Incorporate skylights for additional brightness
This approach creates a welcoming gathering space your family will actually want to spend time in.
Choose Materials and Storage Designed for Small Spaces

The real skill in a compact kitchen extension happens when you prioritize smart storage over square footage. I’d recommend floor-to-ceiling cabinetry that maximizes every inch while keeping precious floor space open for movement. Your hidden storage solutions, such as built-in benches with lift-up lids, keep everyday items accessible yet invisible.
Choose slimline cabinetry and panel-ready appliances to avoid visual clutter. Glass fronts and open shelving reduce heaviness while reflecting integrated lighting beautifully. These choices create an airy, spacious feel.
Continuity matters tremendously. Align your seamless flooring and cabinetry with existing design elements, creating a unified extension that feels naturally larger. When storage solutions work hard behind the scenes, your small space suddenly feels well-considered, welcoming, and genuinely functional for daily living.
Plan Utilities Early to Avoid Costly Mistakes

How you position drainage points, electrical outlets, and ventilation at the outset determines whether your extension flows beautifully or requires expensive mid-construction rework.
I’ve learned that planning utilities early makes them central to your design rather than afterthoughts. You’ll want to:
- Map drainage points before pouring foundations to avoid costly relocations
- Position electrical outlets around your workflow for seamless integration
- Align extractors and windows with ventilation requirements and kitchen zones
- Coordinate utility layout with structural constraints to prevent complications
- Address nitty-gritty details upfront to save substantial time and money
When I aligned my layout with foundation plans, the entire project moved smoothly. Your electrician and plumber become design partners, not problem-solvers. Getting these decisions right means your extension functions like you envisioned, without surprise expenses derailing your vision.